
How to Get Cinematic Look in Lightroom
How to Get the Cinematic Look in Adobe Lightroom
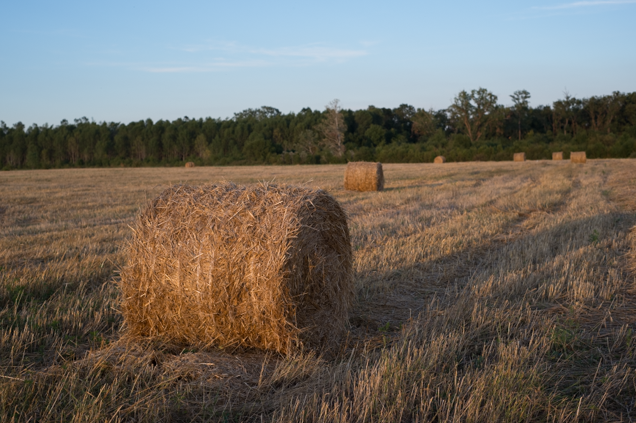
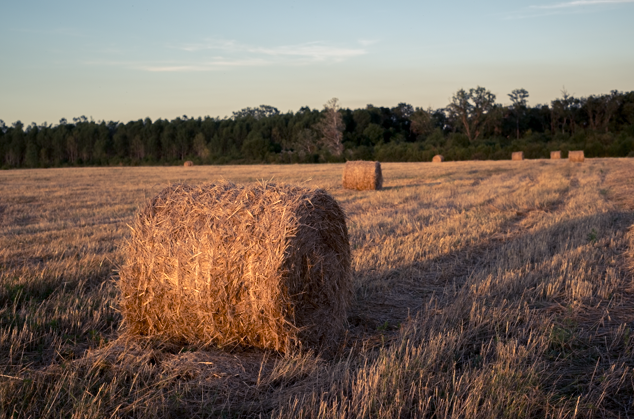
If you want to achieve the cinematic look in Lightroom – the look of blockbusters in your photographs, you are in the right place. Today we are going to look at how you can get the Hollywood Cinematic Look in your photos. Today we are going to learn how to make this picture:
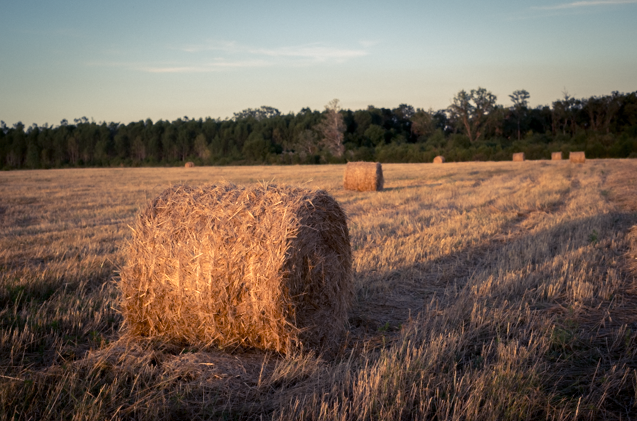
To look like this:

First, we have to do the basic adjustments: exposure, shadows, lights, contrast, white balance, saturation, and vibrancy.
In the basic tab, we will do some adjustments for Highlights, shadows, whites, and blacks. Moreover , we will bring the vibrance to minus -15 and bring up a little bit the white balance. I don’t need to make any exposure or contrast changes. We already got some contrast by modifying the whites and blacks. Here are the settings now.
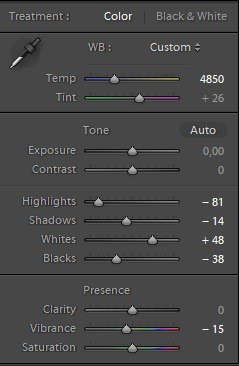
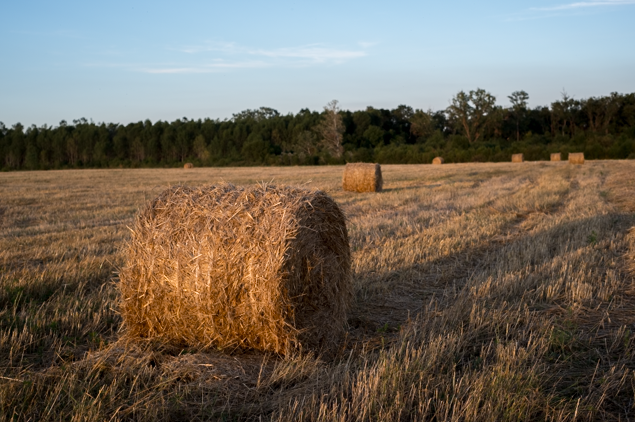
This is how the photo looks now:
You can see it’s already getting better.
Now, let’s go to the HLS tab and we are going to do some adjustments in the luminance section. Bring down the blues and bring up the orange and yellows. Like this:

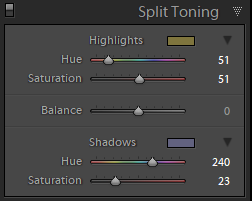
Second, this is where the fun begins. Let’s go to the Split Toning tab.
If you want to get the cinematic effect, you have to do only two things here: put a yellow in the highlights and blue in the shadows. This way not only will you add contrast to your photo, but also will you be adding color tone contrast – as I like to call it. That is because yellow and blue are complementary colors, and put together they give a great overall aspect to your photo.
You have to select the hue slider and if you hold down the “alt” or “option” key, you’ll see clearly what is the color you have selected. Look for yellow; I used the value of 51. Now go to the saturation fader and bring it up a little.
You do the same thing over the shadows hue slider. While pressing down the “alt” key, look for blue, I used the value of 240. Now add a little bit of saturation.
I’m gonna add 51 for highlights and 23 for shadows. Just play with the saturation slider and find what fits best for your photo. And remember, don’t overdo it.
These are my settings for the split toning tab:
And here is how the photo looks now:
Getting better and better.
Now we can do a few more minor adjustments. We can add a vignette, modify the exposure, maybe add some film grain. And this is our final result:
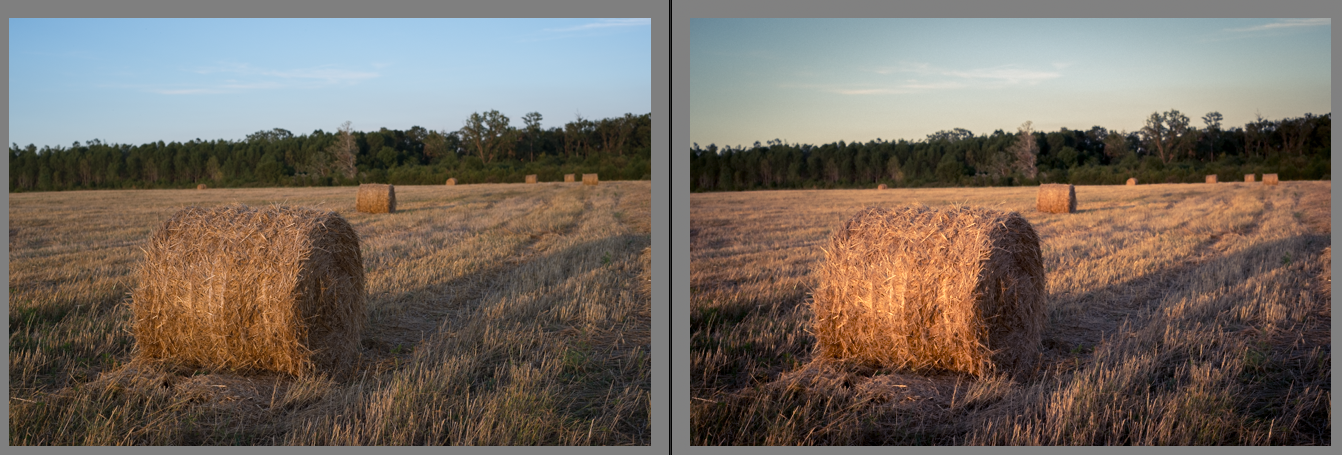
We’ve come a great way, we managed to achieve the cinematic look in Lightroom. Finally, here is a before and after comparison:
Now you can experiment and play with the cinematic look. You can try different colors: orange and teal, brown and aqua. Try with complementary colors and with contrasting colors. Sky is the limit.
Did you find the content here helpful? If yes, I would kindly ask you to join my Patreon page and support the future of this website.