Rule of Thirds in Photography (Explained with Examples)
Learn About the Rule of Thirds in Photography
So, you want to step up your photography game. This is good news! Why? Because if you will know what the rule of thirds is in photography, not only will you take better pictures with your digital camera, but also with your phone.
What is the Rule of Thirds?
The Rule of thirds is the most basic and maybe the best known ‘rule’ in photography. Most of the time, this is the first composition rule a beginner photographer learns.
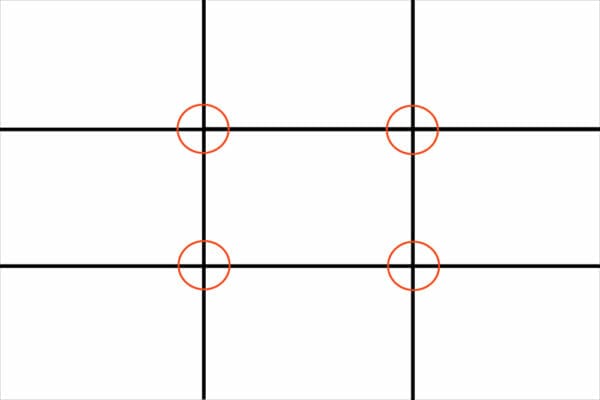
In the most simple sense, the rule of thirds means splitting your frame (or image) into three thirds both vertically and horizontally. That is done by marking two horizontal lines and two vertical lines on your photo. Just like this:

The four points that are encircled with red are the points of interest.
How to Use the Rule of Thirds
Well, what we’ve covered until doesn’t help us unless we know how to put that into practice.
Firstly, let’s look at the points of interest we’ve just talked about. When you are composing your shot, you should align the most important thing in your photo (that would be your subject) with one or more of these points. Here are a couple of examples:

Notice how the surfer is positioned along the right line in the photo and on two points on that line. Following the rule of thirds, this way will give some ‘breathing room’ to the subject.
One more thing: please note how the subject is walking in from right to left, so he is placed along the right end of the photo, giving him space to ‘move’. If you follow this rule, you will give a sense of dynamics in your photo. And it will feel more natural.
Of course, you can break this rule by placing the subject (if it is a human subject) with the ‘face to the wall’, without leaving him breathing room. This will give the photo a more abstract and a more artistic feel. If you are a beginner photographer, you could experiment with this, but beware, it doesn’t always work, but you will figure it out, I’m sure. Have a look at this one example:

Notice how the photo gives you a feeling of sadness and isolation? This is a case where you would break the common rule of thirds.
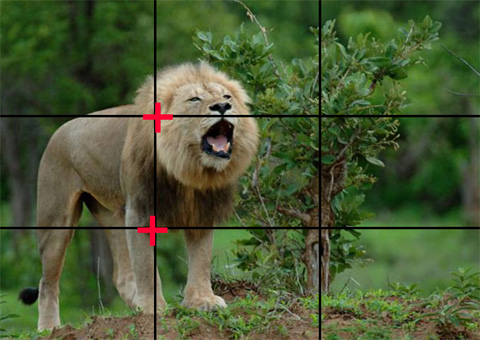
Again, in this picture, the lion is placed in the left part of the frame with ‘breathing room’ to the right. This way, the photo will convey a sense of movement, dynamics and will tell the viewer that there is something to which the lion roars.

Is this example we have two subjects, each one being placed at an opposing point of interest in the photo. The sun is in the upper left and the boat is in the lower right. Notice also how this gives a sense of depth to the picture.
See how the subject of these photos is put along one of the lines and upon one of the points of interests.
In order to align your subject with one of these points, you will have to move a bit – not only to change the way you frame through your viewfinder but also with your feet. But this is only one way to align the frame using this rule.
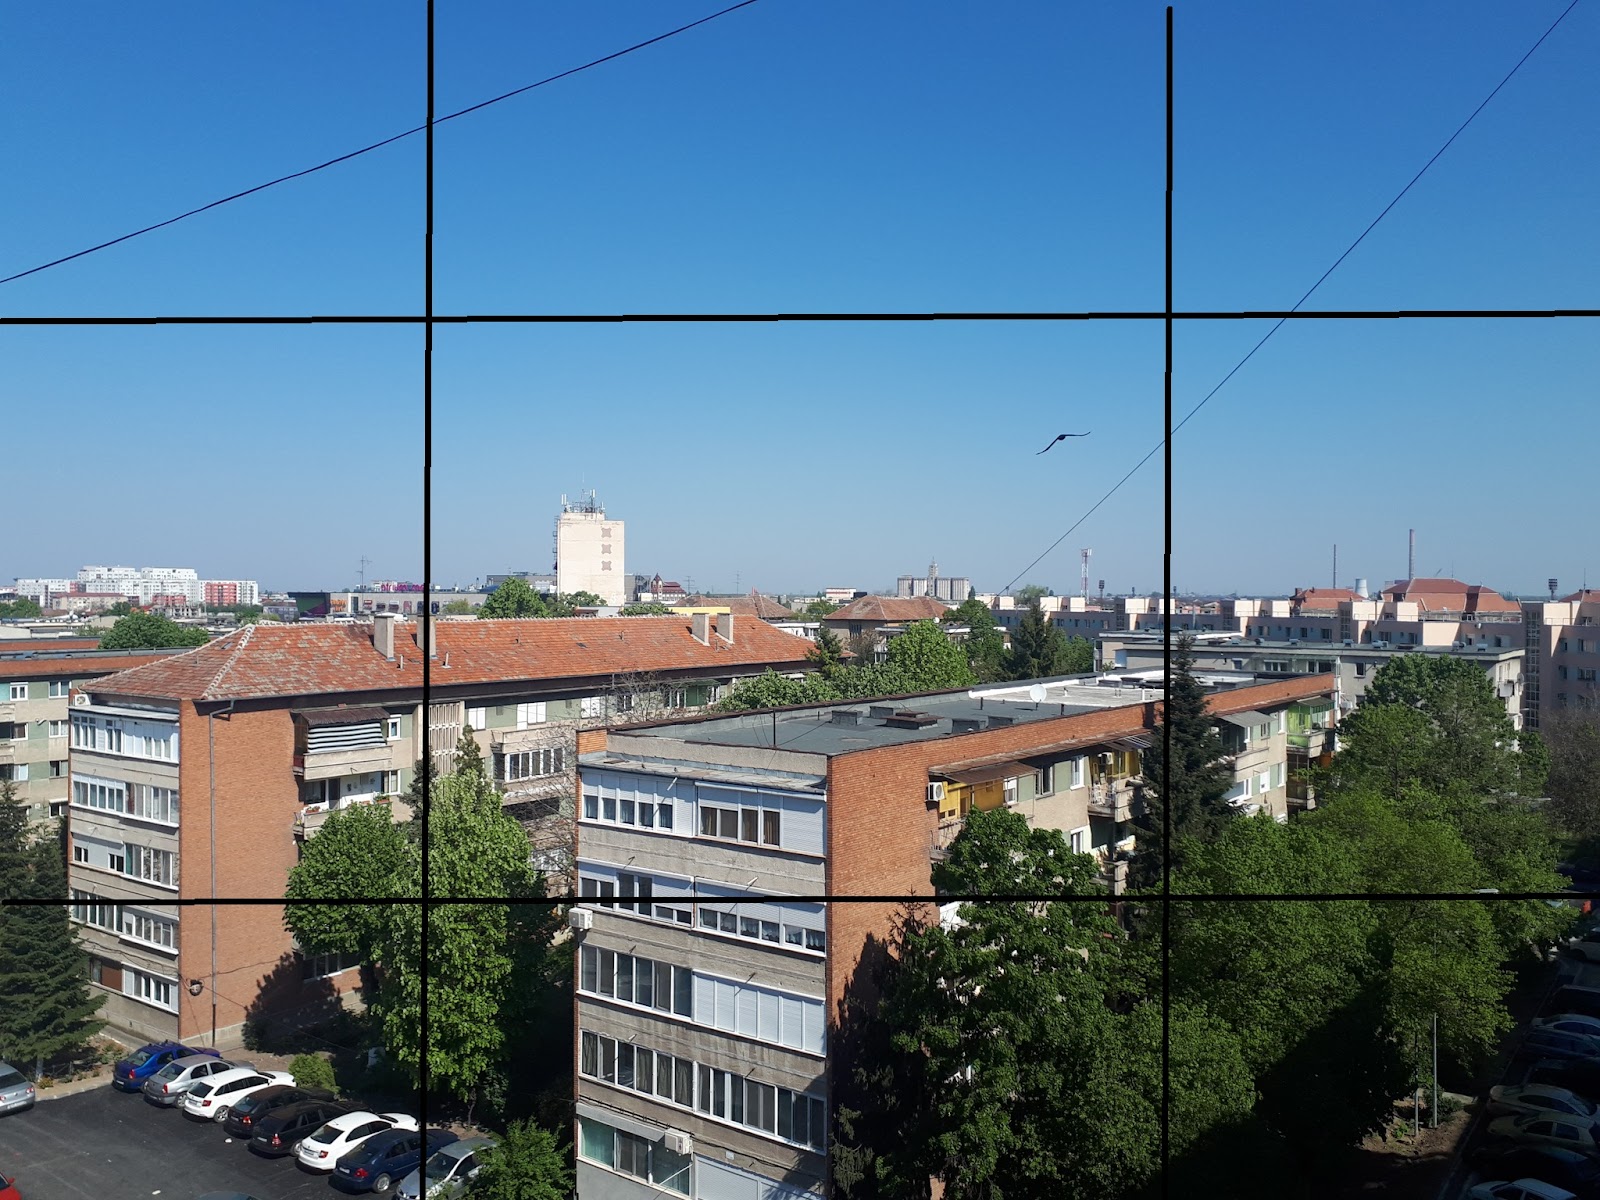
The next way to do this (and you’ve already seen it in the last example) is to line the horizon to one of the horizontal lines. Let’s see, here are 3 pictures that I took with my phone straight out of my balcony 🙂

Notice how in this photo I lined up the horizon with the horizontal line. Also, I’ve placed that interesting building on the upper left point. Using the rule of thirds this way will put the emphasis on the apartment buildings that are in the two lower thirds. The sky has just one-third of the photo, hence it is not as important as the buildings and the trees (that are placed on a point of interest as well).
Another point that shouldn’t go unnoticed is the feeling that the picture sends. This photo feels cluttered. The buildings are close to each other, they are stretching on two-thirds of the photo, well, it feels just like the city is.

Now, this photo is exactly the other way around. The buildings have only the lower third, but the sky has two upper thirds. This leaves a big negative space (more on that in a later post about composition). In this picture, the sky is the most important.
It also gives a feeling of liberty and freedom. Even though I took the photo in the city, giving the sky two-thirds of the photo will bring a different feel to the image.
Now, let’s look at another version.
How does this one look? Amateurish. How does this one feel? Still amateurish. Why? Because the horizon is straight in the middle, the tall building is not placed in one point of interest. It looks just like a regular photo taken with the phone. Just like an average photo. This one breaks the rule, but it isn’t breaking it in a good way. You may want to say that there is symmetry. That is true, but the symmetry doesn’t help this photo.
When to break the rule of thirds?
We’ve talked about how to use this rule, but when to break it? When should we go the other way around and dump the rule of thirds in favor of something else?
In general, you want to break the rule of thirds when your photo moves towards another rule. For example, you can use symmetry instead of this rule. Have a look at the following photo.

This one breaks every guideline the rule of thirds offers, but still looks great. Why? Because it follows another rule that will replace it. And it works, unlike the other photo.
But let’s look at another example. In this one we will see how symmetry can be incorporated into the rule of thirds.

Notice how the building fills the upper and the lower thirds of the picture, while the sky fills the middle third. This is a great example of how to combine two rules of composition into one photo.
Conclusion
The rule of thirds is one of the most basic rule of composition in photography. Basically, it involves splitting the image in three thirds on the vertical and on three thirds on the horizontal with four lines. If you have the frame split this way will give you the guidelines for where to place the points of interest in your photo.
You could also check out this article on how to take better pictures and see how you can incorporate the tip I gave you there with the rule of thirds we’ve just learned.
Now, what are you waiting for? Pick up your camera and try take some photos using the rule of thirds. Do you have any other suggestions or tips? Comment in the section bellow. Cheers!
Did you find the content here helpful? If yes, I would kindly ask you to join my Patreon page and support the future of this website.