What is iso on camera and how to use it
What is ISO
Are you a beginner photographer and asking yourself what in the world is the ISO setting or your camera? In short, ISO is a setting that affects how bright will your image be. This term remained in the industry since the film photography days.
ISO in Film Photography and in Digital Photography
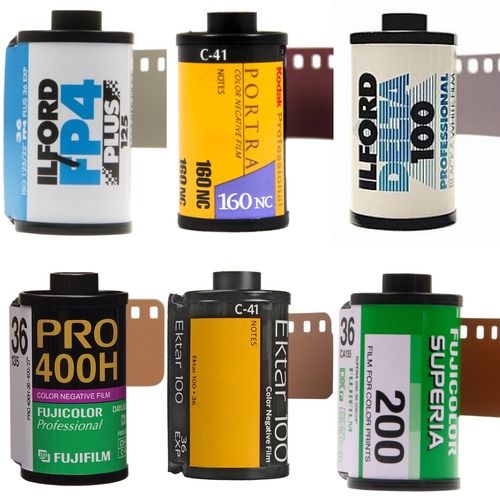
In film photography ISO used to be the film sensibility. You usually bought a film roll and on the package, it had a number like 100, 200, 400 that was the ISO value of the film. Different films had different granulations and the higher the ISO was, the higher was the film grain.
Now, in digital photography the ISO plays a similar role, but not exactly the same. While every sensor has a base ISO value (usually 100 or 200) – just like film rolls used to – the camera can alter this value (higher or lower), and that is the function of ISO in digital photography.
When you change the ISO value, your camera will make your photo brighter. Contrary to popular belief, the ISO value doesn’t alter the sensibility itself, but the brightness of the photo just taken. So, this means that after you’ve taken your picture, the camera will brighten it according to the value you’ve chosen.
For example, if the base ISO is 100, then if you change it’s value to 200, then the brightness will be double of what would have been with the base value (this double increase is called a full stop – more on that in another article).
Having ISO as a flexible value (contrary to how film photography works) gives you different ways to tackle different situations.
ISO Settings for Different Situations
As a photographer you want to learn how to use ISO to your advantage in the different situations you will find yourself into. A variable ISO value means more flexibility, but that comes as a cost – image noise – more on that later, but for now you have to remember this: the higher the ISO, the more noise will be in your photo.
Here are a few guidelines for what values to use and when.
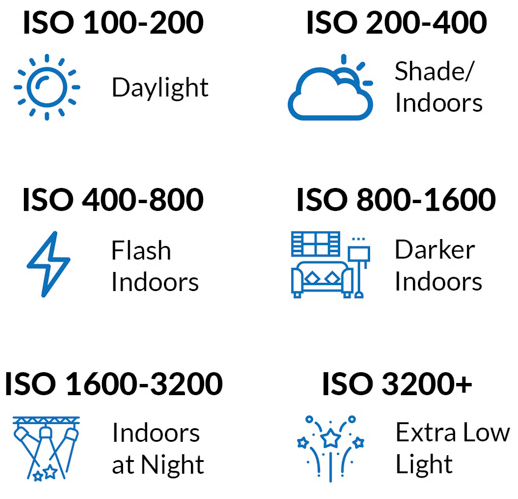
ISO 100-200
If you are outside in broad daylight you should use an ISO value of 100 or 200, this may depend if you are in shade or not, or how quick you want your shutter speed to be. Using any higher ISO value would be only a waste of image quality.
ISO 200-400
If you are outside in shade, it is a cloudy day or you are in a bright indoor area, an ISO value up to 400 would work best.
ISO 400-800
If you are planning on using flash indoors this value would be good in order to get some more details in the background. In general, you don’t want your background to be all dark because the flash will lighten too much your subject. A little higher ISO will bring forth the details in the background.
ISO 800-1600
This range starts to be inevitable for event photographers. Sometimes the halls and rooms won’t be that lit and won’t have all the conditions for photography. Many live events happen in low light situations.
ISO 1600-3200
This is another situation for indoor live events or low light outside events. In these cases, you have no other chance but to use a higher ISO value.
ISO 3200+
This one is high. You should use ISO values higher than 3200 only in extreme situations – most of the consumer grade cameras will get a lot of noise at this value. Maybe you want to get some photos in complete darkness outside or you want to make some photographic experiments. Other than that you shouldn’t use such high values.

Low ISO vs. High ISO
I’ve already stated that you always want the lowest ISO value for any of your photos. A high ISO means more noise.
A lower ISO value means a better overall quality of your photos. On the other hand, a higher ISO value means a better-exposed photo, but with the drawback of noise.

A general rule of thumb is to increase the ISO when you don’t have room to wiggle with the other two exposure elements – aperture and shutter speed.
Here’s a trick, you can use a high iso and don’t get (so much) noise: slightly overexpose your shot.
Why does this work? Because noise appears mostly in the shadows and dark areas of your photo. So, if the shadows and dark areas in your picture aren’t that dark, your photo will have less noise.
Using this trick might even help you get manageable levels of noise in your photo. When you are editing your photos, you can adjust the exposure and bring it down. Also, you can use noise reduction in Lightroom in order to get rid of ISO noise in post-processing.
How to Use ISO on Camera
Now, let’s have some straight talk here. In this section, I wanted to give you some further guidelines on how to use ISO. But what I’ve covered earlier is more than enough.
Now you need something else…
You need to experiment. Pick up your camera, go outside and shoot some photos. Acquiring information is good, but it is useless without putting it into practice.
Maybe you won’t remember all the guidelines, or you will totally forget about this article and many others you’ve read on exposure. But you will have your camera with you. So use it, experiment and find out how things work.
The best way to learn new things is with practice.
The Bottom Line
In every case, you will want to have the lowest ISO you can have. The higher the ISO, the more noise your photo will have, but you can slightly overexpose the photo in order to avoid high amounts of noise in the shadows. Check the guidelines, but the most important part in all of this story is to experiment yourself.
Did you find the content here helpful? If yes, I would kindly ask you to join my Patreon page and support the future of this website.